**These instructions and scripts assume you will be using Microsoft Visual Studio 2022**. Building SatDump on Windows requires Microsoft Visual Studio 2019 or greater. If you are using another version of Visual Studio, update `windows\Build.ps1` as necessary.
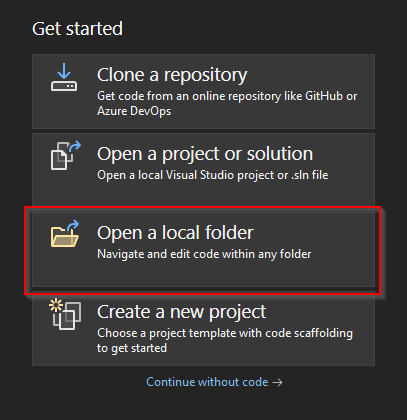
4. Keeping the developer console open in the background, open Microsoft Visual Studio. On the launch screen, select "Open a local folder", and select your cloned SatDump repo.
5. Once the project opens, select "Open CMake Settings Editor"
- **CMake toolchain file:** set this to `<full path of your satdump repo>\vcpkg\scripts\buildsystems\vcpkg.cmake`
- **CMake valiables and cache:** check "BUILD_MSVC"
- **CMake Generator (under "show advanced setting):** set this to "Visual Studio 17 2022 Win64"
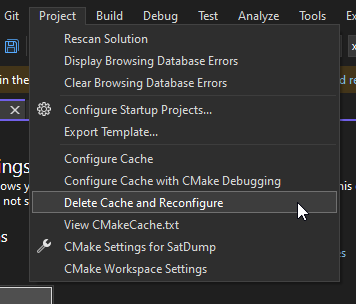
7. Press Ctrl+S to save the CMake Settings. You will usually get an error right away - this is normal. Either way, click Project > Delete Cache and Reconfigure. Confirm the prompt and let cmake rebuild its cache
8. Once cmake finishes, click Build > Build All. Go get come coffee because this takes several minutes
9. Once you get the "Build all succeded" message, go back to your developer terminal (it's still open, right?) and run `.\windows\Finish-Debug.ps1`. This will copy all necessary DLL files into the debug folder.
10. That's it, you're ready to debug! To make any changes to the code and build again, just repeat steps 8 and 9 before launching the debugger. **Step 9 is important, because it copies the plugin DLLs into the right spot for SatDump to load them!**
3. Add the satdump launch arguments in the form of an array. If you compose the argument list elsewhere and copy/paste it here, it will turn it into an array for you. You may need to clean it up, though
