mirror of
https://github.com/SatDump/SatDump
synced 2026-08-13 17:47:30 -04:00

101 lines
5.5 KiB
Markdown
101 lines
5.5 KiB
Markdown
# Building on Windows
|
|
**These instructions and scripts assume you will be using Microsoft Visual Studio 2022**. Building SatDump on Windows requires Microsoft Visual Studio 2019 or greater. If you are using another version of Visual Studio, update `windows\Build.ps1` as necessary.
|
|
|
|
Compilation is currently only available for 64-bit Windows.
|
|
|
|
**On install, set Visual Studio up for use with:**
|
|
- Desktop development with C++
|
|
- Under "Individual components", install "Git for Windows" as well.
|
|
|
|

|
|
|
|
## Automated PowerShell Build Instructions
|
|
Using the automated PowerShell build scripts is the easiest way to build SatDump on Windows.
|
|
|
|
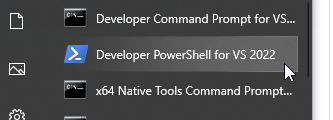
1. Open "Developer PowerShell for VS 2022" from the start Menu
|
|
|
|
|
|
|
|
2. cd to a directory where you want to build SatDump
|
|
3. Run the following commands, one at a time
|
|
```powershell
|
|
git clone https://github.com/SatDump/SatDump
|
|
cd SatDump
|
|
.\windows\Configure-vcpkg.ps1 # Downloads a preconfigured vcpkg to the correct
|
|
# location and adds SDRPlay libraries.
|
|
.\windows\Build-SatDump.ps1 # Builds SatDump
|
|
.\windows\Finish-Release.ps1 # Copies all necessary files into the Release folder
|
|
```
|
|
|
|
Your build SatDump will be in the `build\Release` folder of the SatDump repo.
|
|
|
|

|
|
|
|
## Building in Visual Studio for Debugging
|
|
Compiling in Visual Studio for Debugging is for advanced users who aren't afriad to get their hands dirty!
|
|
|
|
1. Open "Developer PowerShell for VS 2022" from the start Menu
|
|
|
|

|
|
|
|
2. cd to a directory where you want to build SatDump
|
|
3. Run the following commands, one at a time
|
|
```powershell
|
|
git clone https://github.com/SatDump/SatDump
|
|
cd SatDump
|
|
.\windows\Configure-vcpkg.ps1 # Downloads a preconfigured vcpkg to the correct
|
|
# location and adds SDRPlay libraries.
|
|
```
|
|
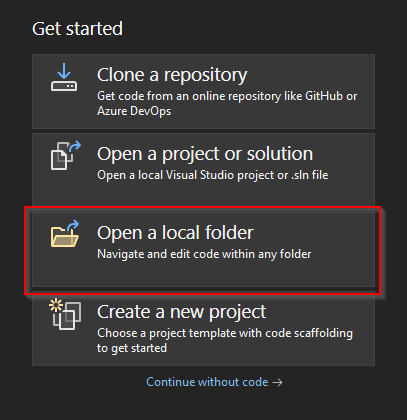
4. Keeping the developer console open in the background, open Microsoft Visual Studio. On the launch screen, select "Open a local folder", and select your cloned SatDump repo.
|
|
|
|
|
|
|
|
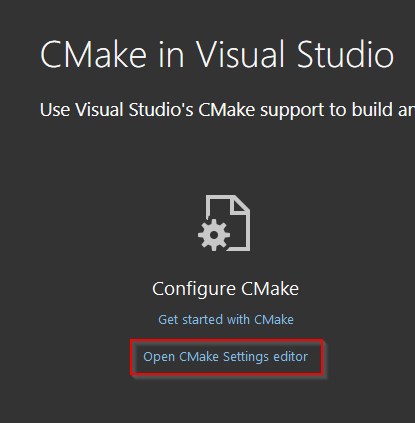
5. Once the project opens, select "Open CMake Settings Editor"
|
|
|
|
|
|
|
|
6. In CMake Settings, change the following items:
|
|
- **CMake toolchain file:** set this to `<full path of your satdump repo>\vcpkg\scripts\buildsystems\vcpkg.cmake`
|
|
- **CMake valiables and cache:** check "BUILD_MSVC"
|
|
- **CMake Generator (under "show advanced setting):** set this to "Visual Studio 17 2022 Win64"
|
|
|
|
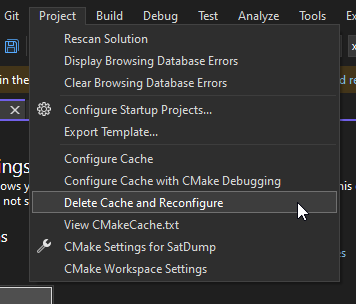
7. Press Ctrl+S to save the CMake Settings. You will usually get an error right away - this is normal. Either way, click Project > Delete Cache and Reconfigure. Confirm the prompt and let cmake rebuild its cache
|
|
|
|
|
|
|
|
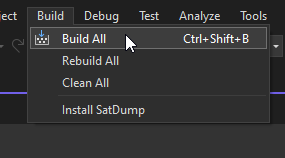
8. Once cmake finishes, click Build > Build All. Go get come coffee because this takes several minutes
|
|
|
|
|
|
|
|
9. Once you get the "Build all succeded" message, go back to your developer terminal (it's still open, right?) and run `.\windows\Finish-Debug.ps1`. This will copy all necessary DLL files into the debug folder.
|
|
10. That's it, you're ready to debug! To make any changes to the code and build again, just repeat steps 8 and 9 before launching the debugger. **Step 9 is important, because it copies the plugin DLLs into the right spot for SatDump to load them!**
|
|
|
|
## Debugging SatDump UI
|
|
Once you built SatDump for debugging in Windows, using the debugger is the same as it is with any other Visual Studio project.
|
|
|
|
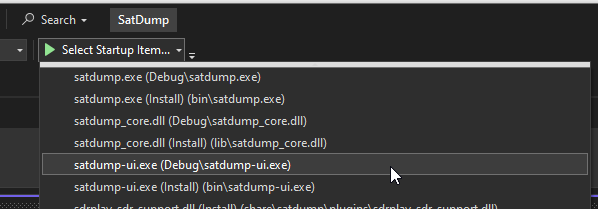
1. At the top, set the startup item to "satdump-ui.exe" (not the installed one!)
|
|
|
|
|
|
|
|
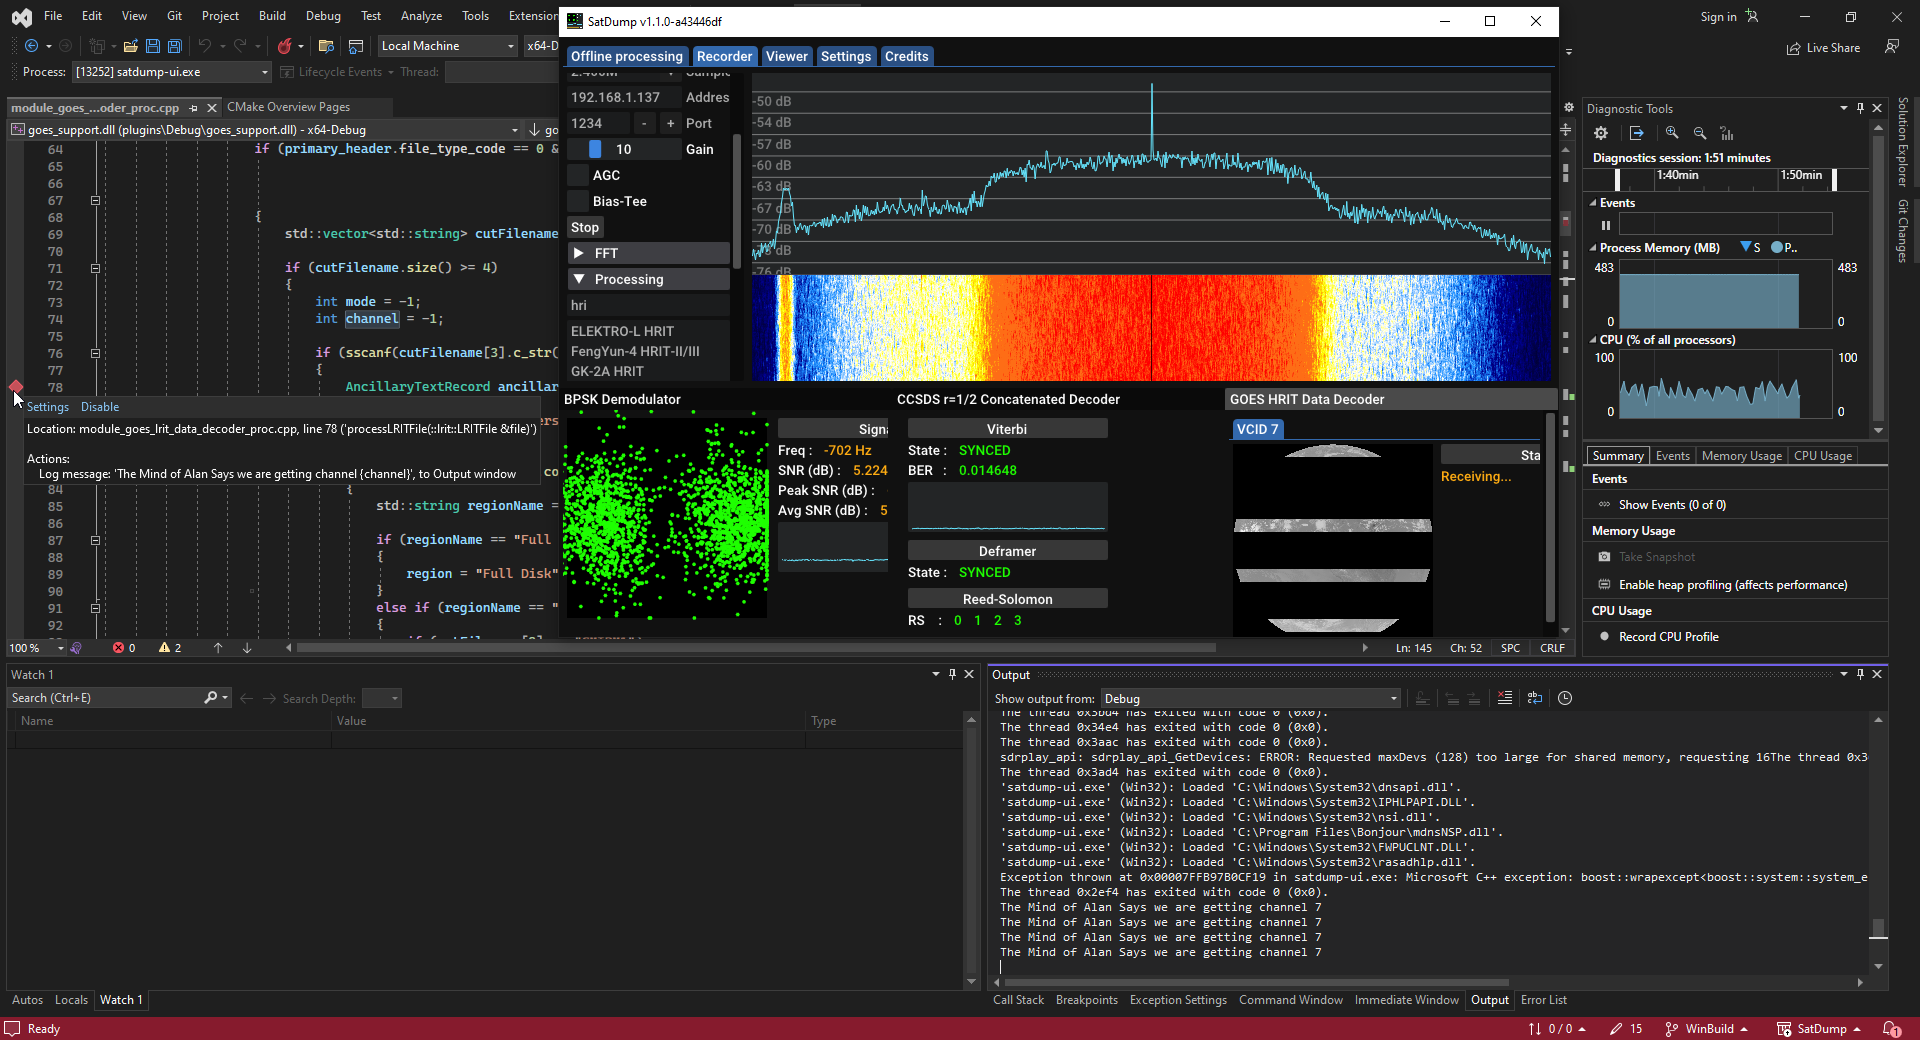
2. Click the green start icon to start debugging SatDump-UI. Breakpoints and other tested debugger functionality works as expected
|
|
|
|
|
|
|
|
## Debugging SatDump CLI
|
|
Debugging the CLI version is similar to the UI, but you need to provide command line arguments
|
|
|
|
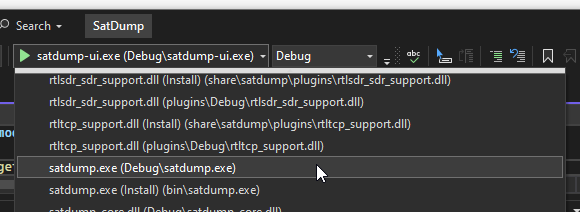
1. At the top, change the startup item to "satdump.exe"
|
|
|
|
|
|
|
|
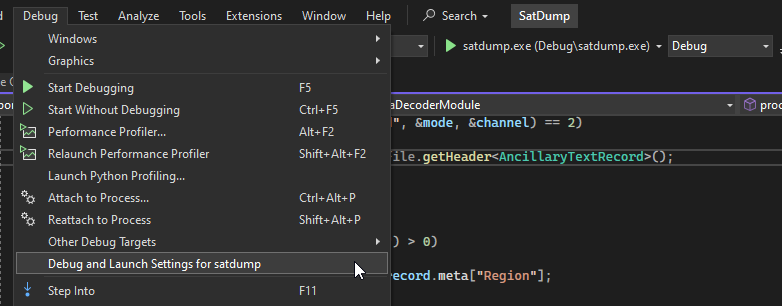
2. Go to Debug > Debug and Launch setting for SatDump
|
|
|
|
|
|
|
|
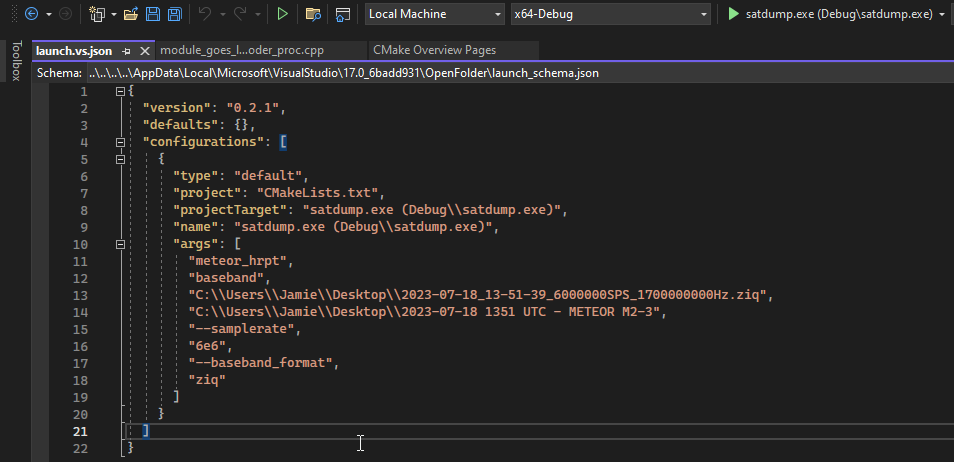
3. Add the satdump launch arguments in the form of an array. If you compose the argument list elsewhere and copy/paste it here, it will turn it into an array for you. You may need to clean it up, though
|
|
|
|
|
|
|
|
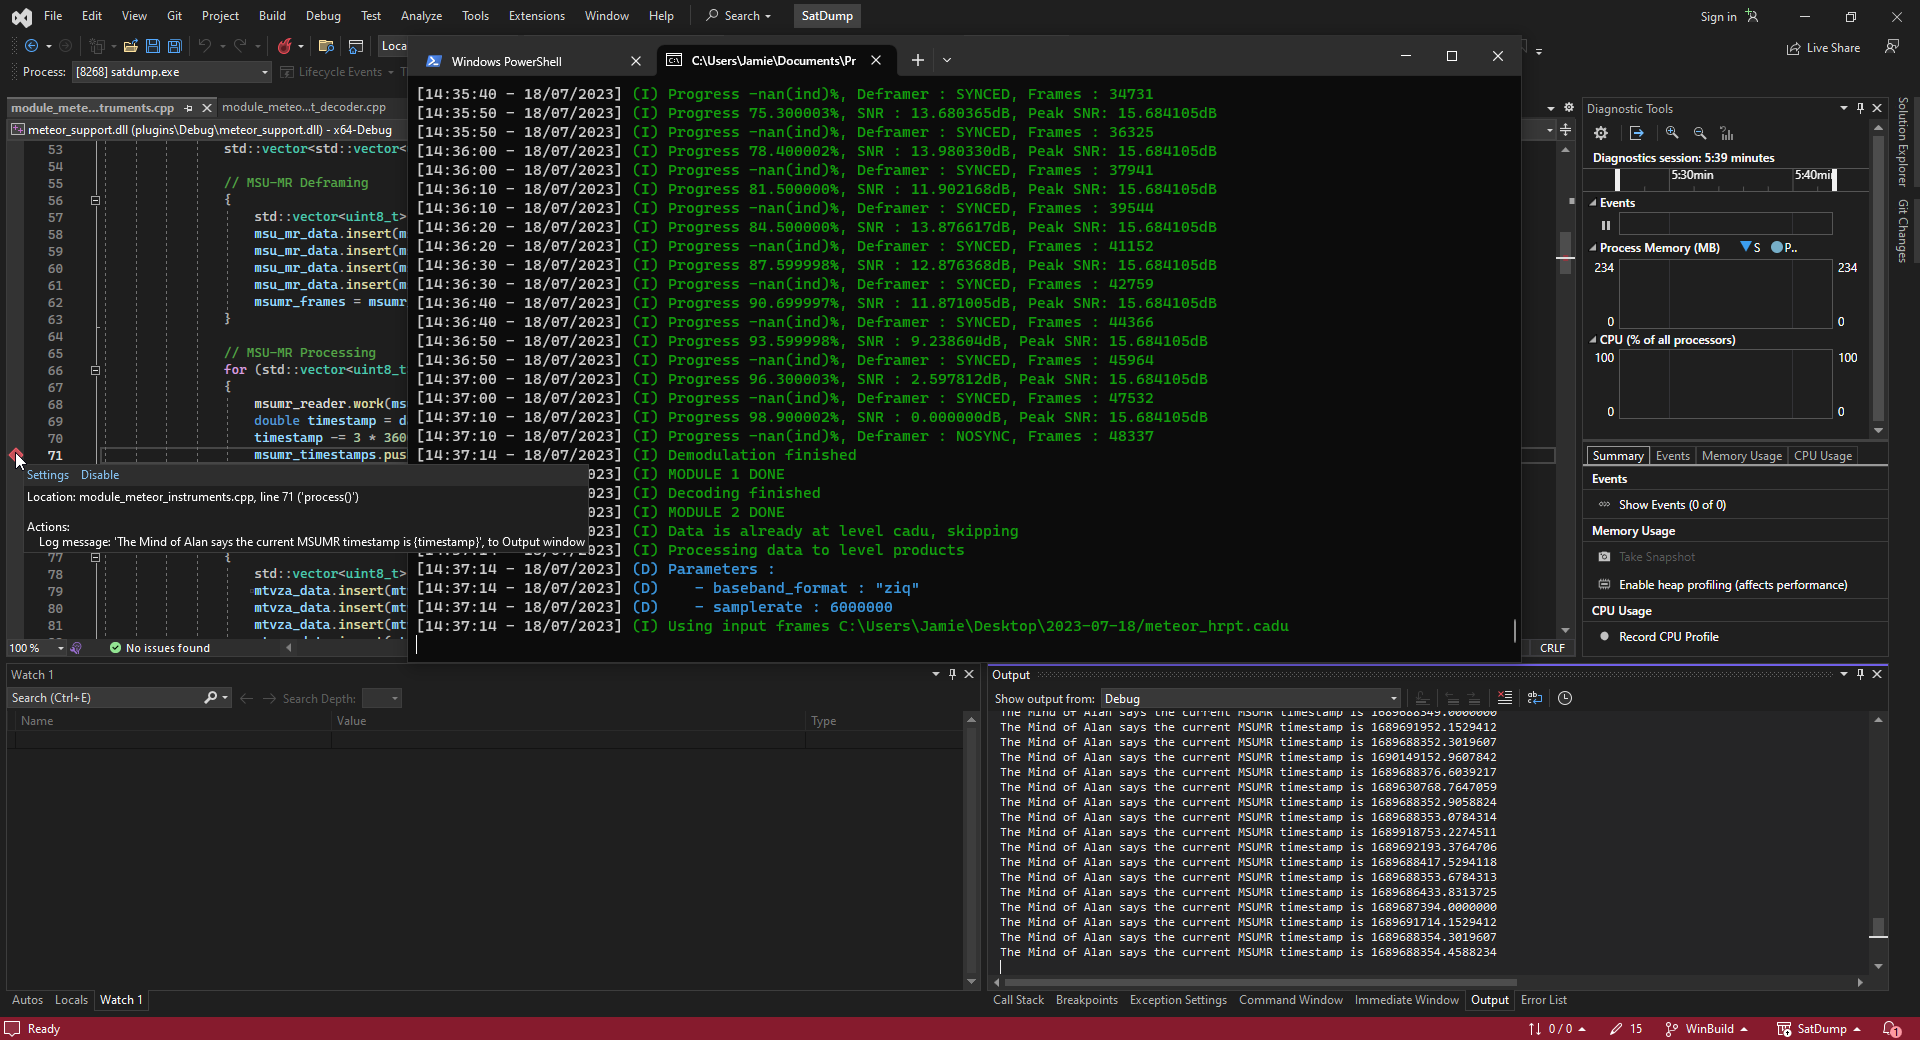
4. Click the green start icon to start debugging SatDump.
|
|
|
|
|